Tag Archives: Photo IC

Combine 3 Images

This tutorial is for beginners to intermediate. The focus is on:

  • Creating an image for Web use
  • Placing images
  • Using various selection tools
  • Creating Layer masks
  • Using refine edge function
  • Work with Layer Blending Modes

Create an Image for Web

Start off Photoshop. Create a New Document (Ctrl+N). Choose:

Preset: Web

Size: 800 x 600 (px)

Resolution: 72ppi

Create a New Document for Web

Placing Image

First select a close-up photo of texture from here: Link to Images! Select one and save it to your folder and back in Photoshop place the image in your file: File>Place and create a size that covers most of the background.

Do a Google Image Search for German photographer August Sander. Refine your search to large images (this can be done in Search Tools>Size>Large).

Alternatively click on here: Google Search for August Sander.
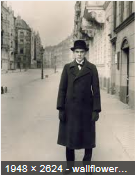
Find this image - but do NOT use this thumbnail. It is small...
Find this image – but do NOT use this thumbnail. It is small…

Save the image in your folder and return to Photoshop. Place the image in your file: File>Place and create a size in which the man stands in the foreground with his face being placed about 3/4 in the top.Hit Enter to accept.

Using various selection tools

Use various Selection Tools to select the background behind the man.  See this tutorial for more information on Selection Tools.

After Using the Magic Wand Tool and the Polygonal Lasso

Creating Layer masks

After selecting the entire background create a Layer Mask to hide the background. See this Photoshop Essential Tutorial on How to create a Layer Mask.

Example of Layer Mask. Click the Layer Mask button to activate and hide everything but your selection.
Example of Layer Mask. Click the Layer Mask button (encircled in red) to activate and hide everything but your selection.

Using refine edge function

Use a Macro option on your camera to allow for good detail for the close-ups.

Use the Refine Mask function (Shortcut in CS6 is Ctrl+Shift+R) and smoothen out the mask edge.

Work with the background and reduce it to the size of a rectangle:

  • Make a selection with the Rectangular Marquee
  • Apply a Layer Mask to the selection

Work With Layer Blending Modes

Last play with the Layer Blending Modes. Create a result like this one:

Image with masked background and masked man
Student work by Jarred Kalwig- Photo: August Sander (man)
Work by Federico Viola - Photos: August Sander (man), Federico Viola (close up)
Work by Federico Viola – Photos: August Sander (man), Federico Viola (close up)

Photograph Texture

This is less a tutorial and more a task. Explore the world around you! Look close and photograph the surfaces and textures that surround you.

You will be surprised what objects and surfaces may look like when photographed up close.

Keep taking close-up images as often as you encounter interesting surfaces and keep adding them to your library of textures. These textures are great to use in Photoshop. Some of the textures can be scanned as well.

What Types of Texture Can You Think of?

You can look at textures based on their origin:

Natural Textures are part of our natural world and you find them on objects that occur in nature:

Ostrich - Photo: F.Viola
Ostrich – Photo: F.Viola
  • sand
  • earth
  • rock
  • water
  • tree bark
  • leaves
  • grass
  • fur
  • skin
  • hair
  • feathers
  • scales
  • sky
  • clouds
  • stars

Man-made Textures are part of our built environment and manufactured world:

Rubber Matt - Photo: F.Viola
Rubber Matt – Photo: F.Viola
  • walls
  • bricks
  • concrete
  • metal
  • glas
  • paper
  • fabric
  • wool
  • silk
  • velvet
  • weaves
  • plastic
  • grids
  • corrugated surfaces
  • screens
  • photos
  • prints
  • text
  • paint
  • cement

You see that the list is quite extensive. You could add another category to this and call it imperfections or noise.

Imperfections would be all the textures, that have surface marks that have been added to it and can either destroy the look or appearance or add character:

Steps - Photo: F.Viola
Steps – Photo: F.Viola
  • scratches
  • dents
  • imprints
  • watermarks
  • stains (oil)
  • coffee rims
  • torn materials
  • rips
  • punched holes (eg nail holes)
  • cracks
  • rust
  • melted
  • burn marks
  • fading

Photo Advice

Morning - Photo: Irish Eyes - morgueFile.com
Morning – Photo: Irish Eyes – morgueFile.com

When taking the photos outside try to take the shot at different times of the day. Preferably pick a clear day, with a blue, sunny sky.

Shoot early in the morning or in the late afternoon to get a low sun and you get sunlight at an angle.

Use a Macro option on your camera to allow for good detail for the close-ups.

Take the photos straight on and from angles. Experiment with the angles and see how it affects the appearance of the surface.

Take the shots without flash. Try some alternatives with flash (to see the difference).

Your Task

Just to get you started… pick up your camera and take your time at taking:

  • 5 shots of natural textures
  • 5 shots of man-made textures
  • 5 shots of textures with imperfections
  • save the images into folders:
    • Image Database > Texture > Man-made/natural/imperfect